Order your first eSIM
By the end of this guide you’ll be able to use the eSIM Go API to supply your end users with a QR code for their new eSIM and data bundle.
First though, you’ll learn how to test that the ordering process is working.
We will use four steps to provide our user with a new eSIM and data bundle:
- Add a bundle to your eSIM.
- Download QR Codes
- User installs the eSIM on a compatible device.
- Check the status of the a bundle assigned to an eSIM.
How it works
Just like plastic SIMs, the mobile data bundles which your users buy are applied to eSIMs, which are either already installed on a device, or can be downloaded and installed, using a QR Code.
In effect, the eSIM is a user account provided by the Mobile Network Operator (MNO). We identify this eSIM with an ICCID (Integrated Circuit Card Identifier).
This account can then be assigned access to network privileges. These are what we call ‘bundles’. For example, (1GB) for a specific period (7 Days), in a certain country (NL). This gives you the bundle name, such as esim_1GB_7D_NL_V2
The /orders endpoint can be tested by keeping "type": "validate" in the request. This will allow you to test the eSIM ordering process, without reducing your credit balance.
Before you start: Test the eSIM bundle ordering process
When ordering a bundle via the API, you have the option to test if the order will be successful before you commit to the purchase.
Make sure you have located and entered your API Key. This is needed for authentication purposes.
-
Open the API Orders endpoint documentation in a new window
-
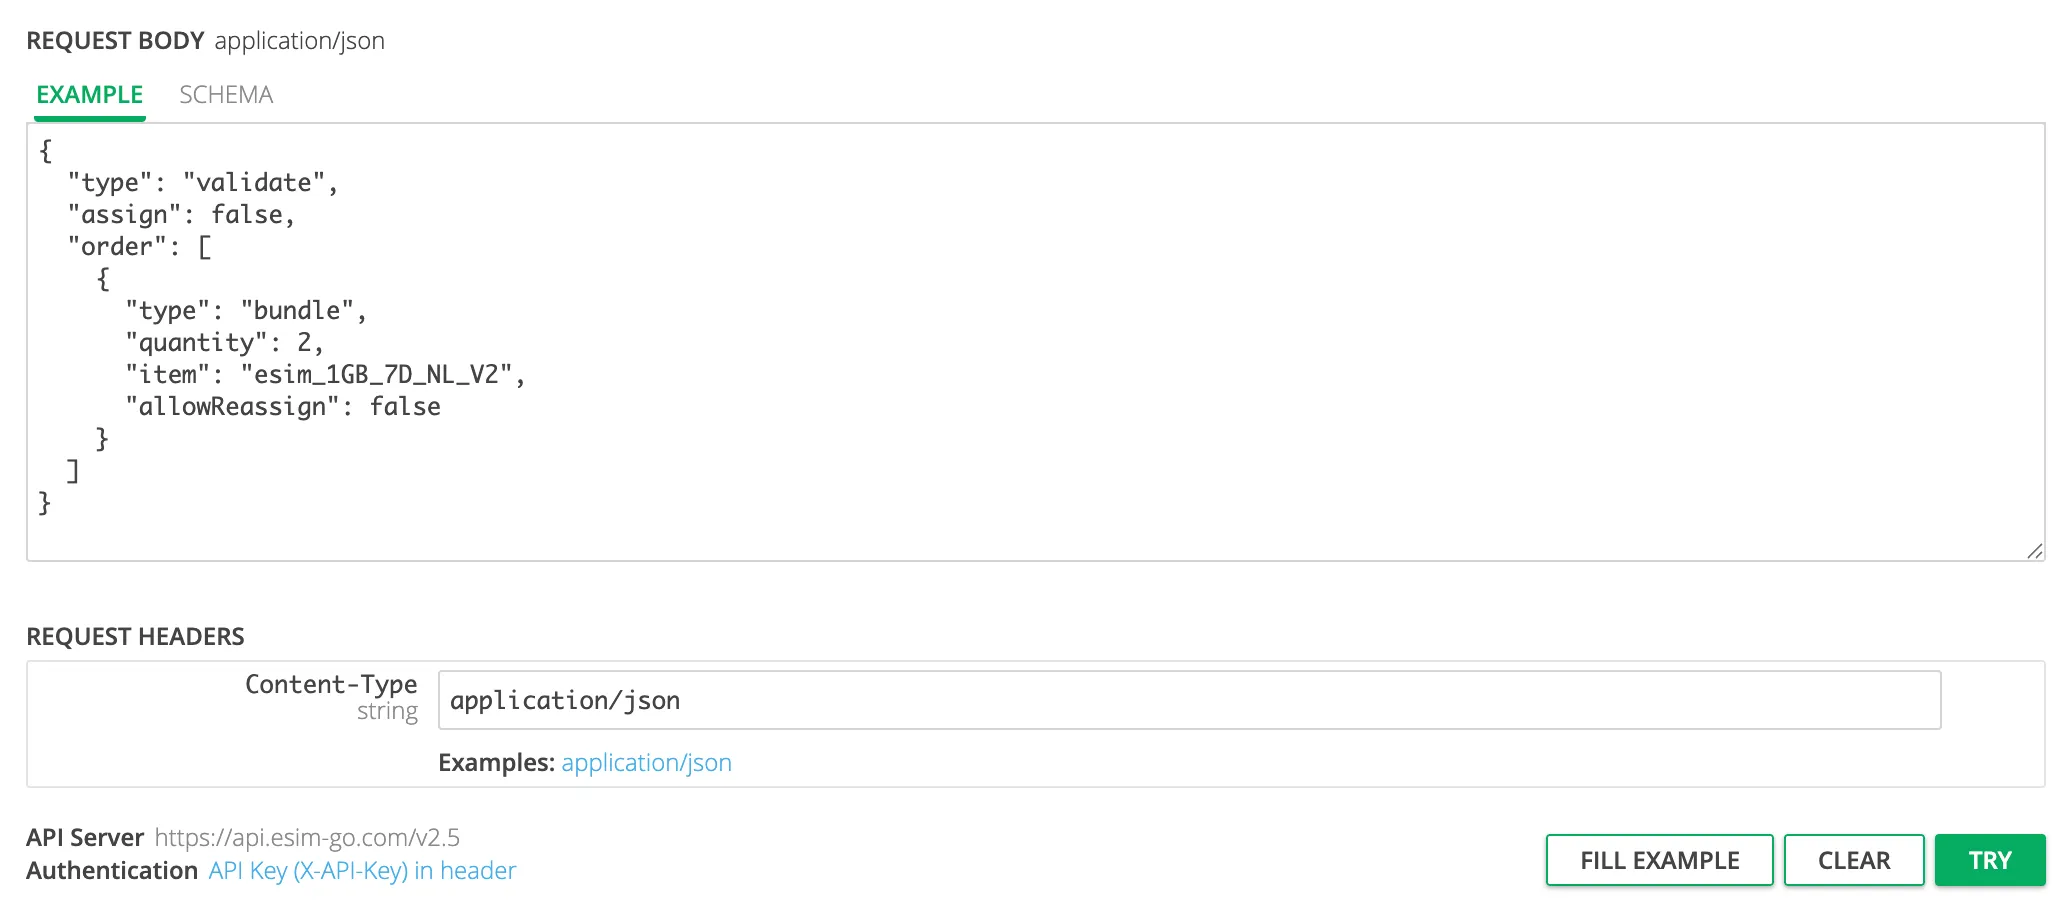
Find the REQUEST BODY section.
-
Click EXAMPLE
-
Set
typeasvalidate -
Enter
quantityof bundle required - in this example,2 -
Set
itemto the name of your chosen bundle. In this example we usedesim_1GB_7D_NL_V2
Names of bundles are case sensitive and can be found in the API catalogue
- Click ‘Try’ and you should see a RESPONSE similar to the one shown below
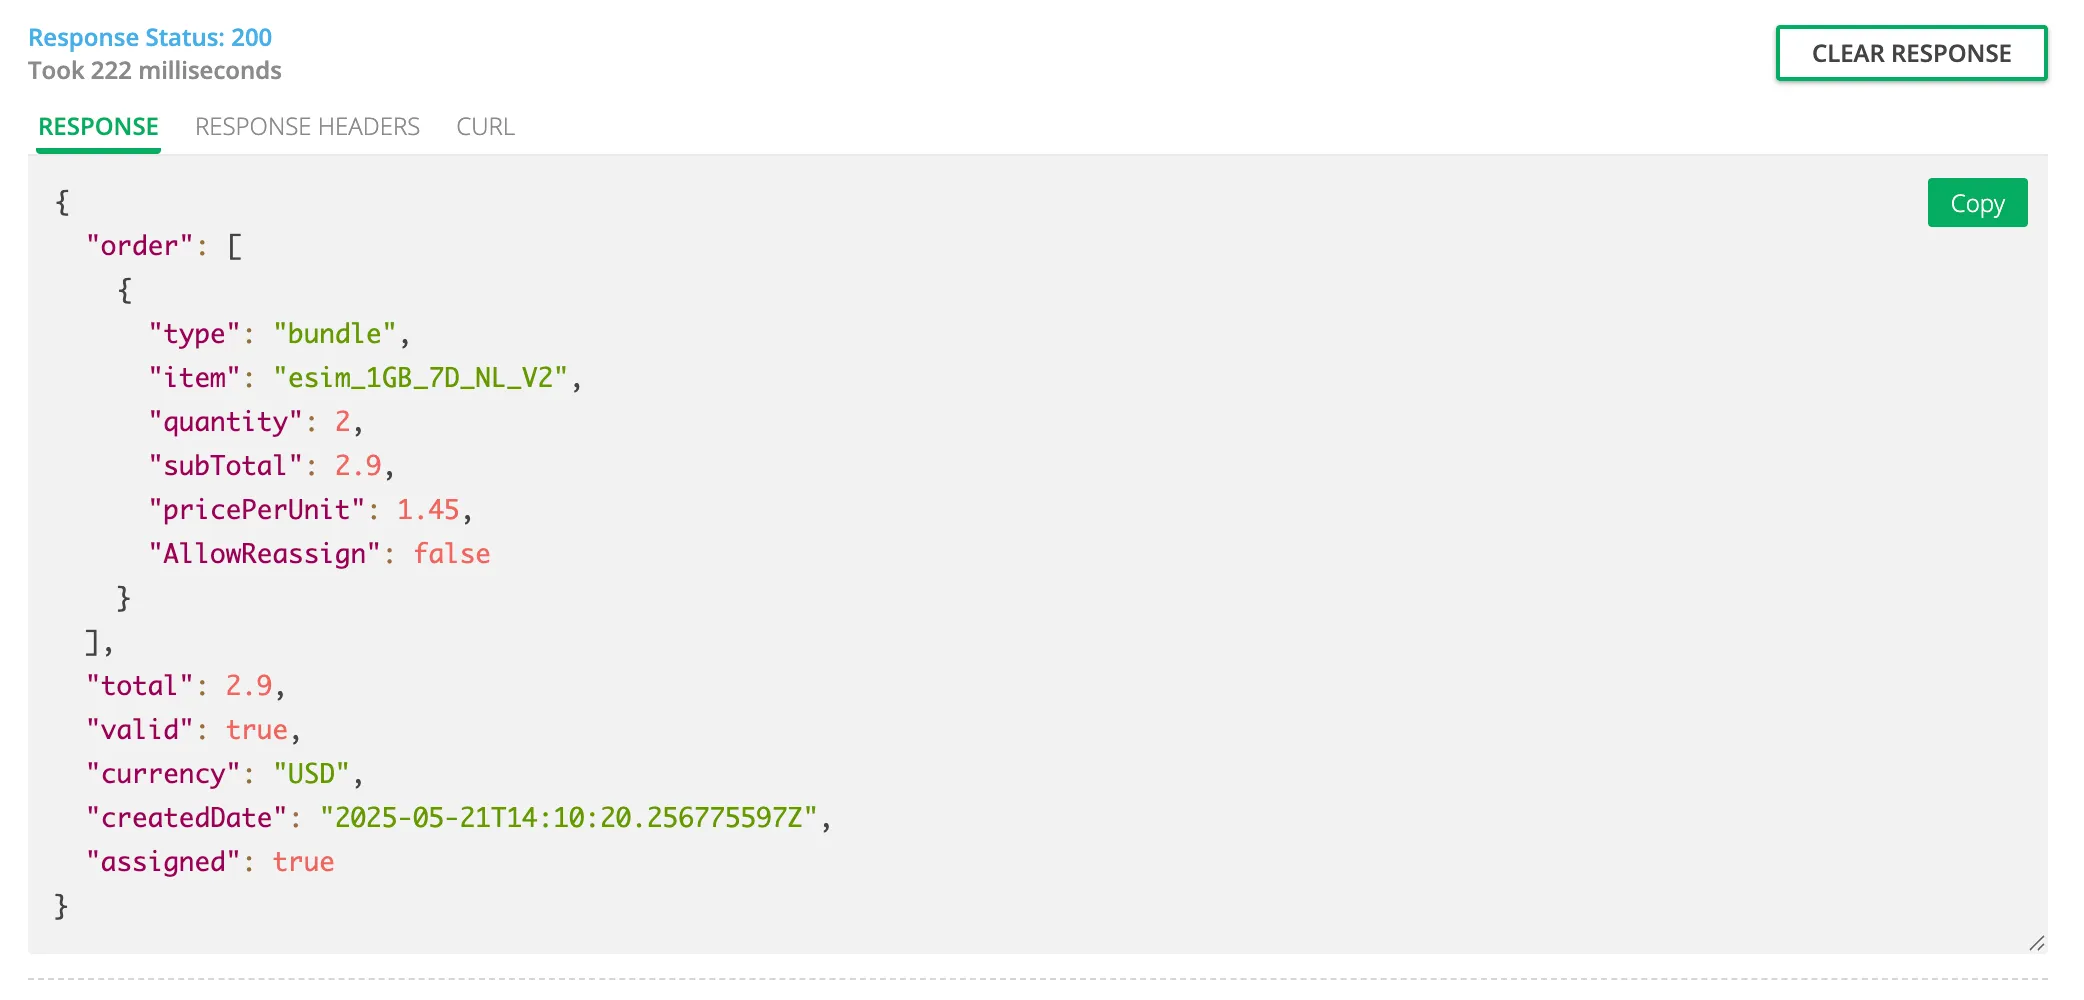
If the transaction was valid, you’ll see total value in the RESPONSE.
If the transaction failed you’ll see an error message detailing the issue.
Once you’re happy that the process is working as it should, you can Create an eSIM using the API.
Order an eSIM using the API
When a customer orders a particular data bundle, (for example, 5GB, for 30 Days, in France) they may or may not already have an eSIM able to accept this bundle as a top-up.
If they don’t have a suitable eSIM, you’ll need to create and assign one for them. This can be accomplished through the API or the portal. Here we’ll cover the API process.
QR Codes
When creating a new eSIM using the API, you have two options for generating QR codes:
- Generate a default QR code (either a generic eSIM Go QR code or one using eSIM Go’s branding feature)
- Generate your own QR code if you don’t use our branding solution
For simplicity, we’ll just cover the default case here. See our help pages for how to create branded QR codes.
1. Add a bundle to your eSIM
Order the required bundle using /orders endpoint: https://docs.esim-go.com/api/#post-/orders
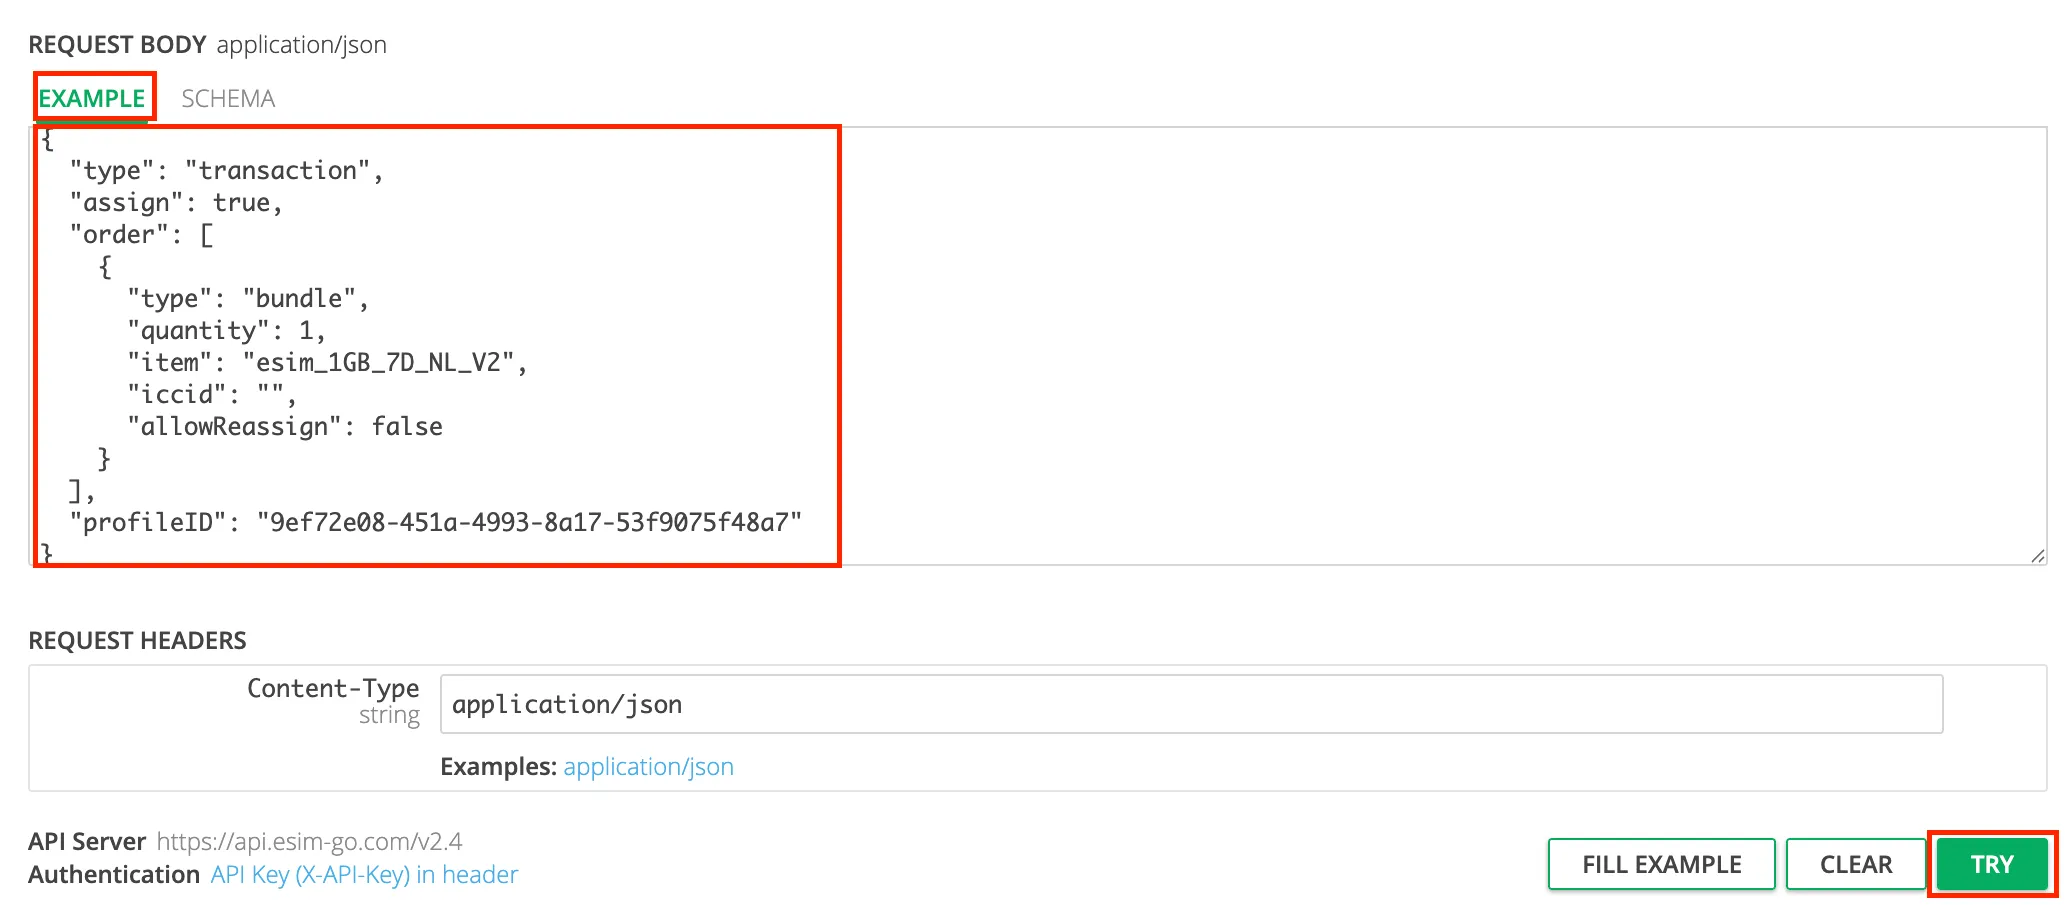
- In the request body click ‘EXAMPLE’
- Set
"type"to"transaction" - In this example
"assign"is set as"true"and it means that the bundle would be assigned to the eSIM. If you want to add a bundle to the inventory and assign it to the eSIM later, set"assign"as"false" - Enter
"quantity"of bundle required - this example uses1 - In
"item"enter the name of the bundle. This example uses"esim_1GB_7D_NL_V2" - If you set
"assign"as"true"and you want to assign your bundle to a new eSIM, just for"iccid"delete"string"(leave speech marks). If it’s"false", you can remove the"iccids"bit. - If you would like to generate eSIM with default branding profile - you can remove
"profileID"parameter. If you have several branding profiles and want to use a different from default profile, please set a profile ID in"profileID". You can find branding profile ID by logging in to The Portal and navigating to “eSIM Branding”. - Click ‘Try’
- If you have a successful transaction then you will see in the ‘RESPONSE’ section:
"statusMessage": "Order completed"along with the number of eSIMs assigned. - You will use the
orderReferencevalue to download your QR codes later.

2. Download installation QR Codes
To download the QR Code as a .ZIP: Use API endpoint: https://docs.esim-go.com/api/v2_4/operations/esimsassignments/get/
- Format selection is controlled via the
Acceptheader in the request. If you want to download your QR in .ZIP format, please set it up asapplication/zip. The response is a ZIP file containing QR code images in PNG format - Enter the order reference from the response in step 1, the example here is:
e268b769-1cb3-4335-aed8-52ecb78425e9 - In response you will see a binary value, so you can write that to file.
You will now have a zip file available to open, inside you will see the QR code in PNG format and also a CSV with the relevant ICCID(s)

3. User installs the eSIM
Now, your user can use the QR Code you generated in step 2 to install their eSIM.
Read our article on how to install a new eSIM.
4. Check the status of a bundle assigned to an eSIM
Now we can use the https://docs.esim-go.com/api/v2_4/operations/esimsiccidbundlesname/get/ endpoint to see what’s happening with our user’s bundle.
This will tell us whether a bundle has begun to be used and how much data is left to be consumed.
- In the PATH PARAMETERS fields of the REQUEST section, input your
iccidand bundlename. You should have something like the example below.
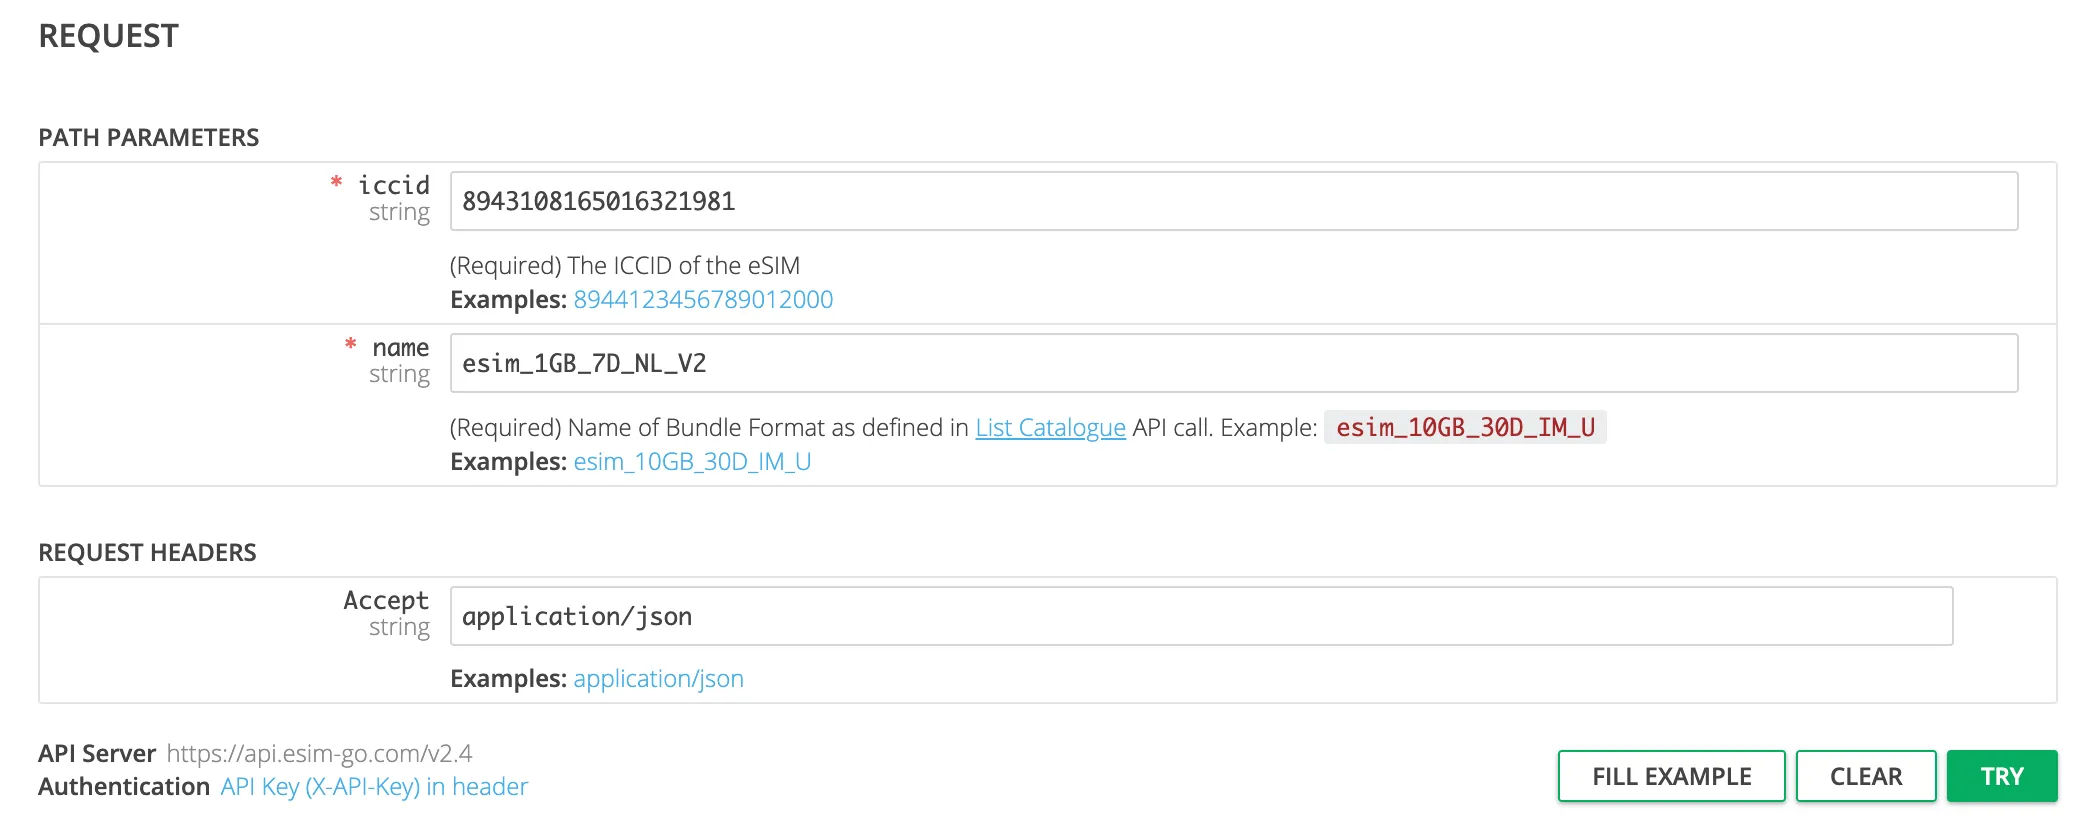
- Click ‘TRY’
You should see a RESPONSE something like the example below:
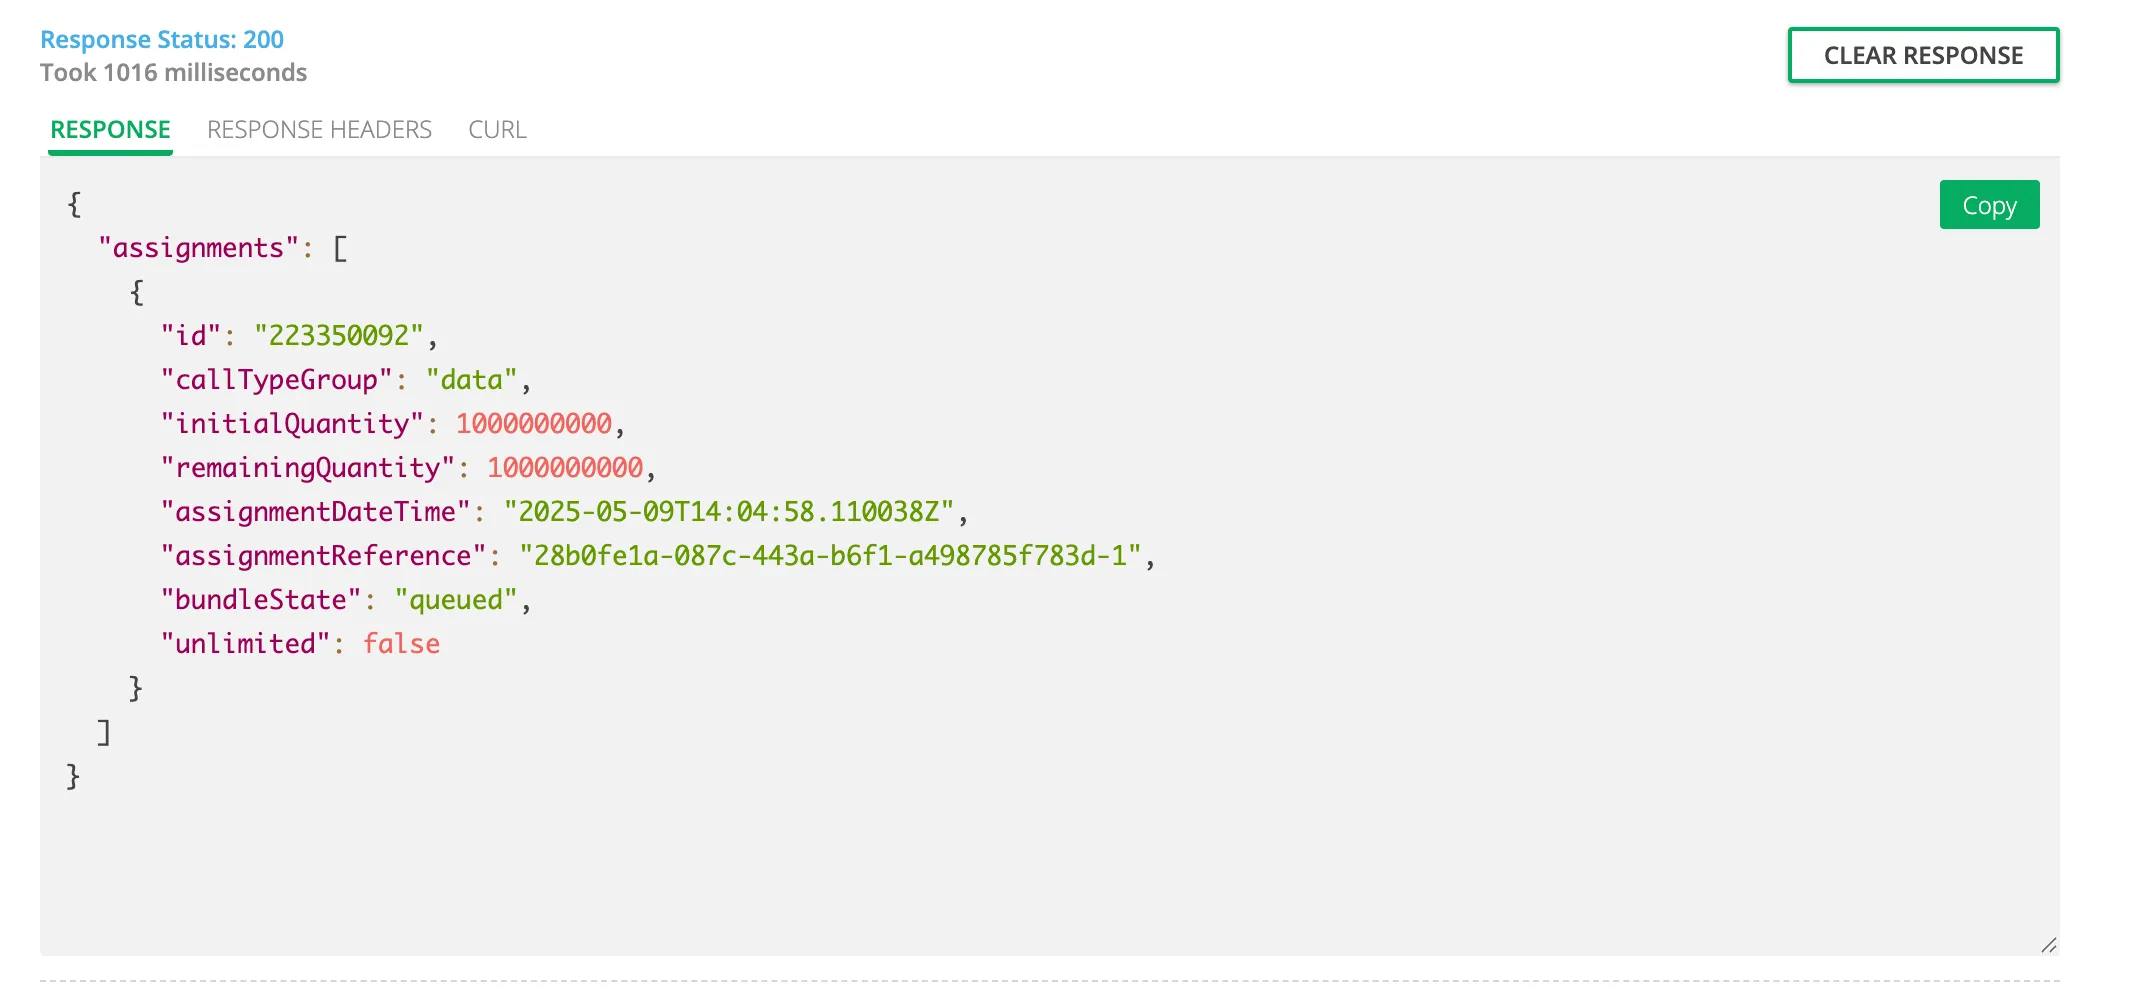
-
bundleStatecan be:processing,queued,active,depleted,expired,revoked,lapsed -
remainingQuantitygives the unused amount of data in bytes